|
![]() |
#1 |
Junior Member
Join Date: Mar 2008
Posts: 73
Likes: 0
Liked 0 Times in 0 Posts
|
![]()
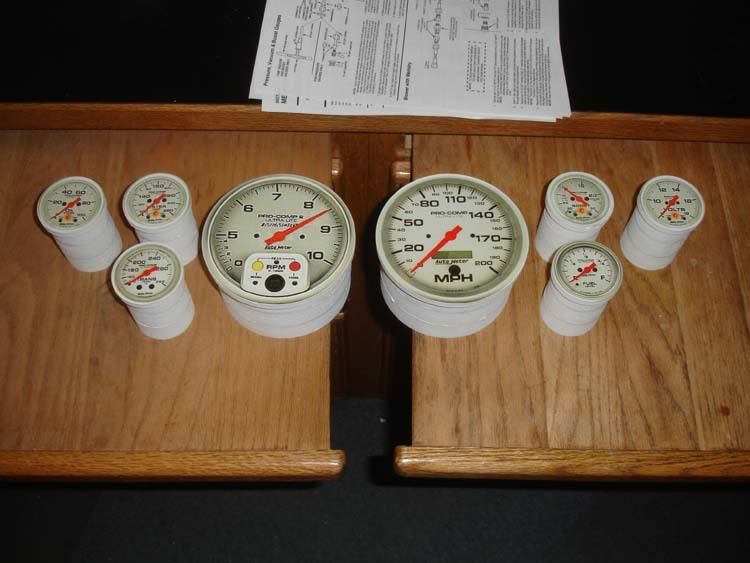
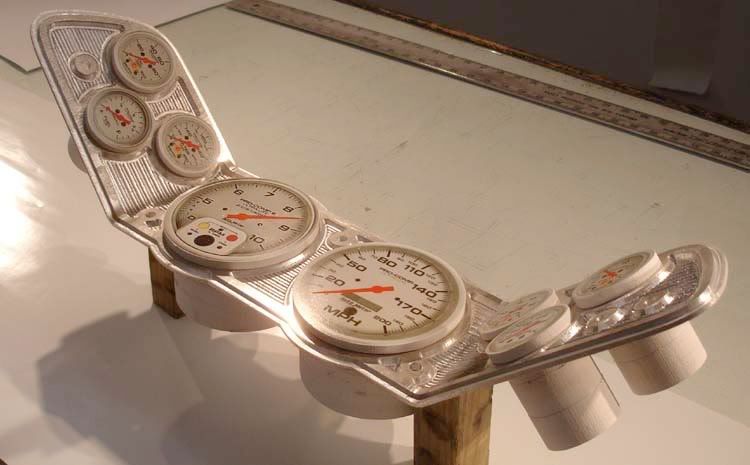
Got the gauges picked out I think for the dash project. . I downloaded the ones I want off the net, sized em' to the specs on the site & printed the faces out on the printer. Then I cut some PVC gauge housings on the CNC. They are a little deeper than the actual gauges but that'll insure I have ample room for the real deals down the road. Now I can make a bezel. That outta' keep me busy for awhile.
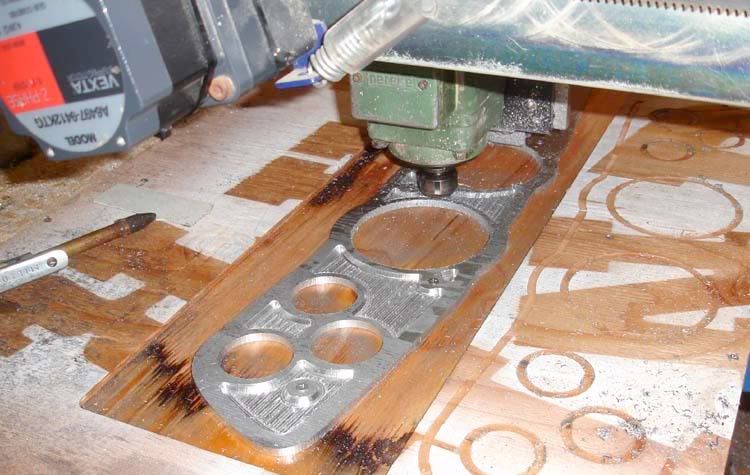
![]() Cut the bezel out on the CNC. There's a bunch of steps to get this thing cut. I keep thinkin' one BooBoo & it's scrap. :shock: ![]() 
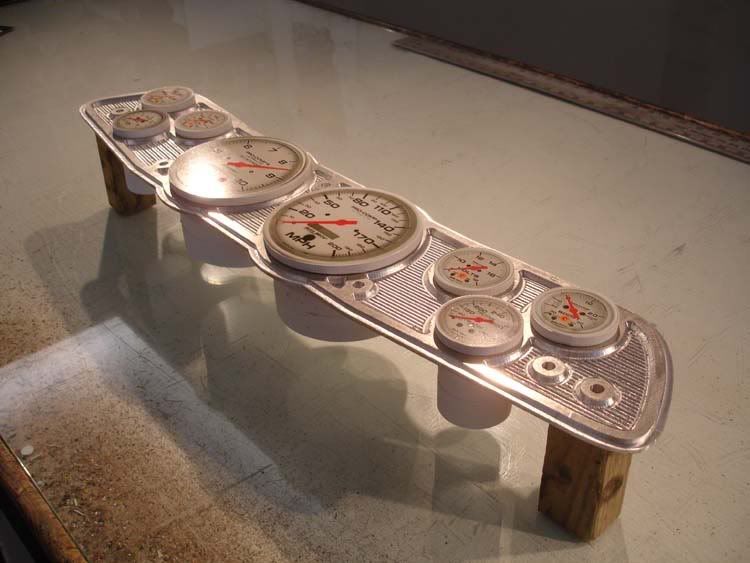
Got the bezel off the table. Now comes the task of bending it in the right places & at the correct angles to fit the dash. ![]() 
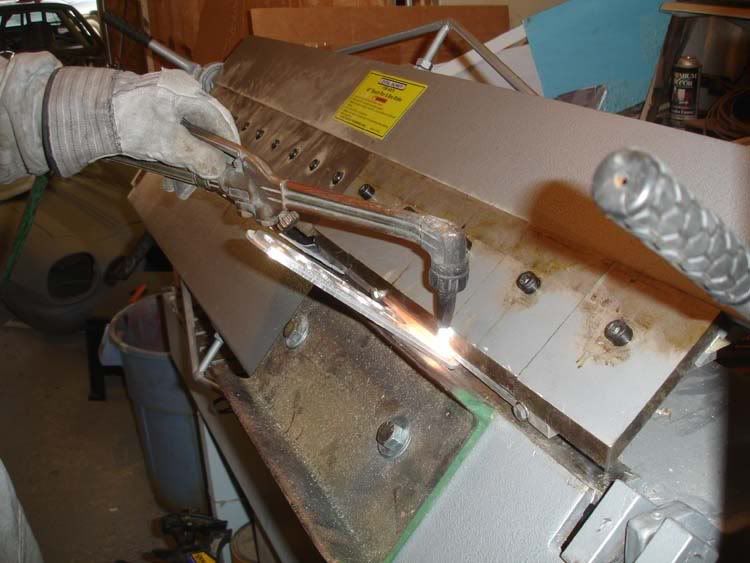
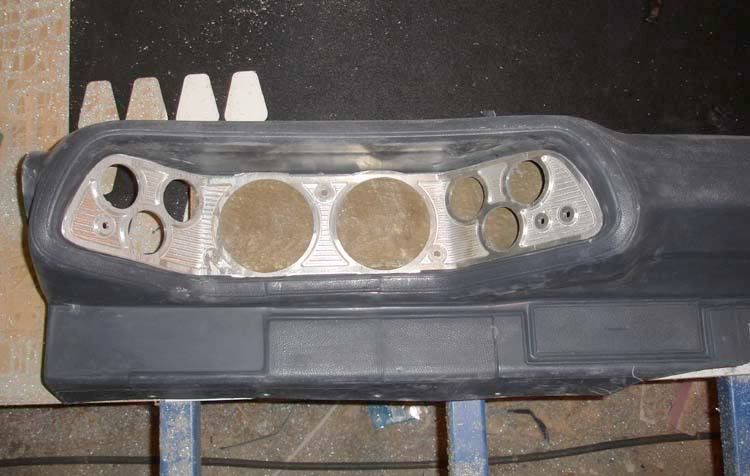
Got it roughed into the dash cover. Still rough but close enough that I know it will fit. The right wing is 1/2" longer than the left wing, so angles are different. I think I got it purdy' close though. Next is to cut the contour in the fiberglass for the oversized tach & speedo. {that's a relief} ![]() ![]() ![]() |
![]() |
![]() |
![]() |
#2 |
Junior Member
Join Date: Mar 2008
Posts: 73
Likes: 0
Liked 0 Times in 0 Posts
|
![]()
Got a little further on the dash today. I made plugs out of PVC to form the gauge wells, since these gauges are too big for the original bezel opening.
![]() I did the kitty hair "form the bezel to the dash deal" again. Used vinyl & spray Pam as a release agent. ![]() One last big hurtle for me. TIG welding on the bezel w/o ruining it. I welded some strap aluminum to the top & bottom to stiffen up the bezel & to provide a place for rubber mounting grommets. ![]() Got the bezel just setting in place. It's being held in by the dash bar. Close enough to see what it'll look like. ![]() |
![]() |
![]() |
![]() |
#3 |
Junior Member
Join Date: Oct 2004
Location: east brunswick, new jersey
Posts: 62
Likes: 0
Liked 0 Times in 0 Posts
|
![]()
very nice work...
go into business for yourself and sale one to me. i got a 79 camaro it would look great. the cost of gauges would be preety high to. but, hell if you had to ask how much you should not be here.
__________________
S/ST 1739 Carlos Mendes |
![]() |
![]() |
![]() |
#4 |
Junior Member
Join Date: Mar 2008
Posts: 73
Likes: 0
Liked 0 Times in 0 Posts
|
![]()
If I told you how many hours I had in that thing you would laugh.....
![]() |
![]() |
![]() |
![]() |
#5 |
VIP Member
Join Date: Feb 2006
Location: Dela-where?
Posts: 2,193
Likes: 1,160
Liked 1,874 Times in 576 Posts
|
![]()
man, that does look good, nice to see someone take pride in their work.
|
![]() |
![]() |
![]() |
#6 |
Junior Member
Join Date: Mar 2008
Posts: 73
Likes: 0
Liked 0 Times in 0 Posts
|
![]()
Thanks Keith
|
![]() |
![]() |
![]() |
#7 |
Junior Member
Join Date: Dec 2007
Location: Chandler, Oklahoma
Posts: 23
Likes: 0
Liked 0 Times in 0 Posts
|
![]()
That is a super job. I wish I had that talent. If I can't make it with Duct tape and J B Weld then I'mn toast.
|
![]() |
![]() |
![]() |
#8 |
Junior Member
Join Date: Mar 2008
Posts: 73
Likes: 0
Liked 0 Times in 0 Posts
|
![]()
Thanks CPOlesen
|
![]() |
![]() |
![]() |
#9 |
Junior Member
Join Date: Mar 2008
Posts: 73
Likes: 0
Liked 0 Times in 0 Posts
|
![]()
Got the bearing housing for the steering column (firewall) done this weekend. Now all I need are those back ordered steering column parts.
![]() ![]() I got one last thing done this weekend. I pulled the old dash out & used the glove box as a plug to make this mold. Got a couple little places to touch up and then I can make up a couple fiberglass glove boxes to finish off around the intercooler. The door has that imitation leather pattern, & the Camaro logo. They came out O.K. so far. ![]() |
![]() |
![]() |
![]() |
#10 |
Junior Member
Join Date: Mar 2008
Posts: 73
Likes: 0
Liked 0 Times in 0 Posts
|
![]()
Little steering column mock-up tonight. The Mark Williams quick release hub came today.
![]() |
![]() |
![]() |
![]() |
|
|